
The Basics of a build
- Building your sauna room:
Building your sauna room the right way is vitally important and we would recommend you do your research to be best informed on the choices you have when it comes to your sauna room. In it’s simplest form what you are desiring to achieve in your sauna build is to maximize Heat, Steam & Ventilation to have the best sauna experience.
When it comes to our sauna kits we are providing you, our customer, with all the interior components and materials needed to finish you sauna room. From the Vapour Foil Barrier, Cedar, Benches, Heater & Control, Door, lights and accessories we ensure that everything for the interior of your sauna room is provided.
*** Note this is not an extensive or exhaustive guide to sauna build but a general quick guideline. There is so much great information that can be far more in-depth but this is meant as a helpful guideline.
Framing:
We recommend standard 2×4 framing on 16’’ studs and a sauna room between 7’-8’ height. (** Please note that all of our pricing is for a standard 7’ ceiling)
Insulation:
You want to choose an insulation with the greatest R-Value that can be found. Walls are recommended to be above R-12 and the ceiling is recommended to exceed R-22. Insulate the walls (floor if possible) and the ceiling between the studs
Vapour Foil Barrier:
We provide a enough Vapour Foil Barrier to fully seal the walls and ceiling of your sauna room. It is important to use stainless brad nails or staples to avoid any potential rust marks in the future. The Vapour Foil Barrier acts as a protective barrier to avoid any potential mold issues and also helps keep the heat inside the room. On any seams it is important to overlay the vapour barrier and seal it with an aluminum tape. Ensure that all seams are sealed and simply install the vapour barrier
Strapping:
Once your room is framed, insulated and applied the vapour foil barrier you want to install strapping to create space between the Foil Barrier and the cedar. This air space is important as it not only provides added R-Value but the space allows for air flow between the cedar and Foil Barrier that helps prevent any risk of molding and helps airflow. Any general or normal strapping is sufficient and you want to apply the strapping horizontally every 12’’.
Ventilation:
Good ventilation in your sauna is very important as the goal is twofold. Firstly you want to be replenishing your sauna room with fresh C02 (** You should not feel dizzy in your sauna) but also to circulate the hot air from the heater down towards the feet of the sauna users with the idea of having the whole body as hot as possible not just your upper body on the highest bench. An air intake vent near the heater (many manufacturers recommend near the bottom of the heater while many European builders have an air intake above the rocks) but an exhaust vent either above the top bench or even below the top bench. These vents can be opened or closed but should allow enough fresh air inside the sauna room and also circulate the hot air down towards the sauna bathers.
Cedar Application:
It is recommended to begin on the ceiling and nail your cedar panel boards perpendicular to the joists. Start on one fall wall and continue until the ceiling is covered. Your brad nails should be nailed into the tongue of the cedar so that it is hidden when the grove of the next board is installed.
To begin on the walls make sure the first board you are to install is perfectly level. Nail your first few boards and make sure to check you are keeping the boards level. in the corner For vertical installation you want to make sure that the first board is perfectly level. Fit the grooves over the tongues and continue along the wall. Along the way, you may need to cut for electrical junction boxes for lights, switches, etc. Continue installing your panel boards until your insulated walls are covered.
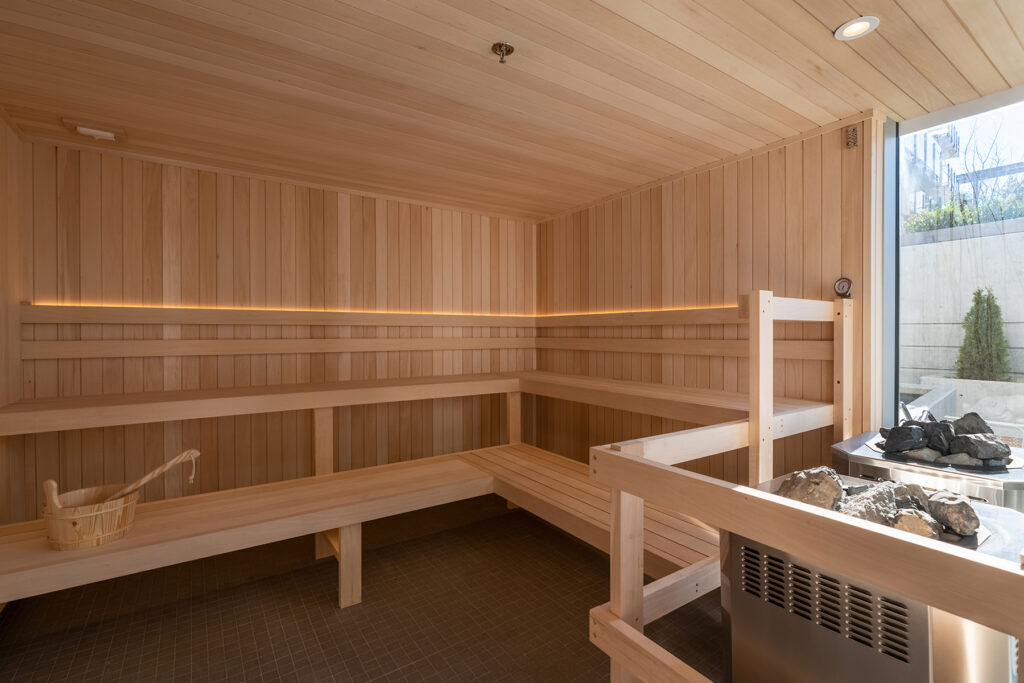
Benches:
Our sauna benches are designed to be aesthetically pleasing, strong and of the same quality that matches every aspect of your sauna room. Every bench is provided with 2×4 (Western Red Cedar) front & rear rails that our routered to allow cross supports to be inserted and our 1×4 top rails to fit perfectly on top finishing off the bench. The strength of the 2×4 rails with proper 1×4 cedar top slats make our benches easy to assemble, strong and of super high quality. Get your benches as high as you comfortably can get to the ceiling to best enjoy the sauna.
Door:
All of our Doors are made with a Rough opening of 26’’x78’’ and we provide a pre-routered door jamb fit perfectly for our door. Every door provided by Homecraft is made by us and is will perfectly match the wood of your sauna. Doors are designed to swing outwards in a sauna for safety reasons and it
Heater:
All Homecraft heaters are CSA and or UL approved for safe use which gives our customers the confidence in the quality & longevity of our sauna heaters. We have been manufacturing saunas since 1987 and know what it is to build heaters that will last a lifetime. Each Homecraft heater is provided with an external digital control that should be mounted on the outside of the sauna room and we provide an external contactor box that relays the hardwired power from your home into the sauna heater. *** All electrical must be installed by a certified electrician.
Ventilation:
Ventilation is often an overlooked area for a good sauna build but the objective is to allow enough amounts of fresh oxygen into your sauna room to replenish the room (avoid dizziness, feeling of exhaustion) of CO2 and as well circulate the air to create even heat distribution throughout the sauna room. A simple guide is to have an air intake vent close to the heater along the bottom of the wall and on the opposite side where the benches are located place a Exhaust (Non mechanical) vent either below the top bench or just above it to create proper air circulation. For a more exhaustive explanation we recommend the following write-up https://www.saunatimes.com/building-a-sauna/your-guide-to-venting-a-sauna/